Crack Resin Injection using hammer in Injectors - for cracks, from hairline width up to 5mm wide. Fast on site repairs in cracked building materials, no mess, simple hammer in plastic injectors fitted with one way valves.
Epoxy or PU Resin Injection in concrete - low pressure, hand tools, no special pumps, no high pressure hazards.
Click to see the Injectors, check prices or buy in our Resins Order Page
Injectors - fitted with one-way valves
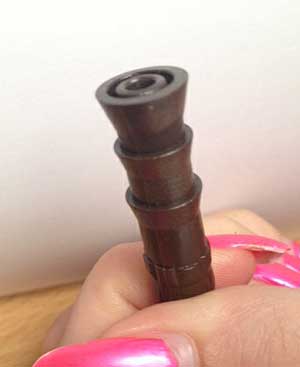
A 10mm diameter x 40mm long hole is required, for flush fitting.
A one-way valve is fitted inside to prevent back flow. Nail Varnish optional.
Click to see the Injectors, check prices or buy in our Resins Order Page
Removing Injectors to leave a smooth surface, after injection
If you wish to pull out the injectors with pliers after injection do not bang them all the way in: leave about 15mm protruding from the surface. Otherwise, they can be drilled out and then filled to match the surface by;
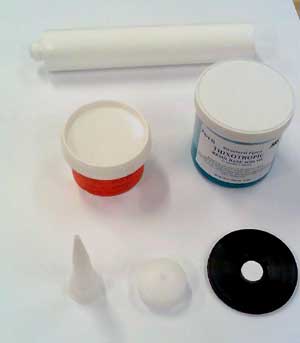
1. Using our Mouldable Epoxy Putty - this can be tinted using our Colouring Powder.
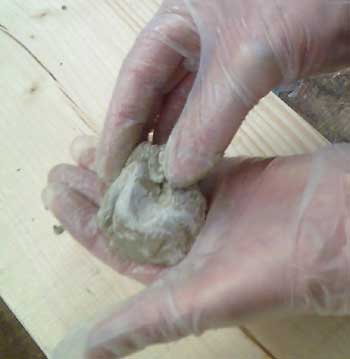
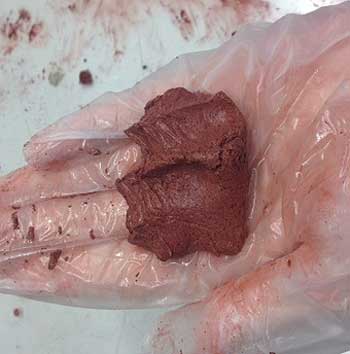
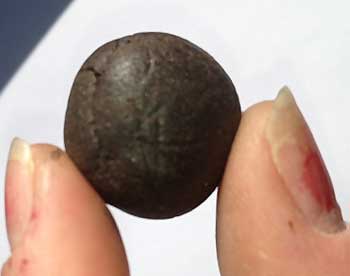
Mixing Mouldable Epoxy Putty and then Red Colouring Powder added, to match red bricks, or Black instead.
2. Using our Plastic DPC Plugs - tapered fit, flat topped, hollow, available in dark brown, red brick or limestone colours.
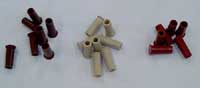
DPC Plastic Plugs to fill 10mm - 12mm holes.
Available in Brown, Red and Limestone.
Cracks suitable for using injectors
You can inject cracks from 'hairline' to 5mm wide using bang-in injectors
You can inject various resins into concrete, render, plaster, stone, brick, wood and some metals.
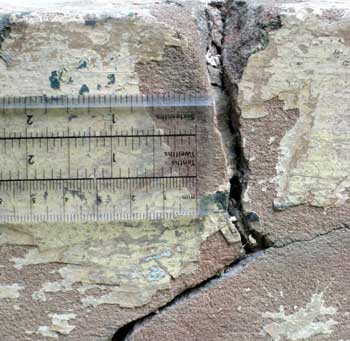
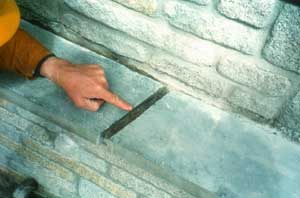
Crack in concrete suitable for Injectors

Smaller crack in concrete, suitable for Injectors.

Splits or 'shakes' in a timber beam, suitable for Injectors.
Click to see this product in our Order Page
How to inject into Cracks using injectors - summary for a range of crack widths
1. Clean the crack surface using water or abrasion to prepare for later filling
2. Wash down with fresh water to remove all debris
3. Drill 10mm diameter holes at between 50mm and 100mm intervals along the crack lines
4. Blow or wash out all the bore dust
5. Bang-in the injectors flush to the surfaces with a hammer
6. Inject either Epoxy Primer/Consolidator, or PU Injection Resin, or Thixotropic Injection Resin.
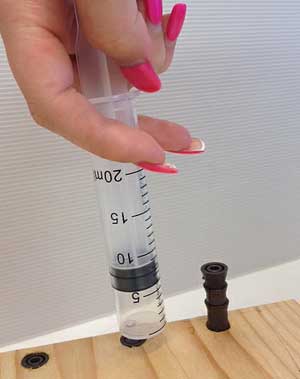
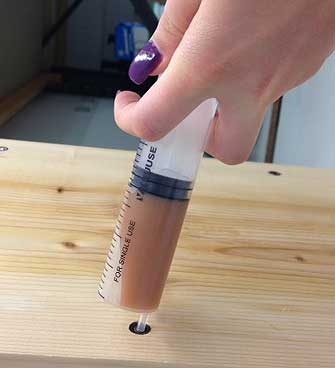
Injection via an Injector using 50ml Syringe.
Click to see this product in our Order Page
How to choose a crack repair resin for injection through an injector
1. Hairline Cracks - not hollow when 'tapped' around the line of the crack
Use Epoxy Primer/Consolidator liquid from a 50ml syringe. Mix up small quantities of the Epoxy and then draw up the mixture into the syringe. Place the syringe tip firmly into the injector and gently push the plunger - you will use very little resin, so go slowly. Stop when resin appears at the surface of the crack. Move to the next injector. Epoxy Primer/Consolidator is a two pack epoxy liquid. It sets by chemical reaction when the two parts are fully mixed in the correct ratio - 2 Base to 1 Activator. It does not object to dampness. It does not expand or contract on setting.
Injecting Epoxy Primer/Consolidator with a 50ml syringe.
Click to see the Injectors, check prices or buy in our Resins Order Page
2. Hairline Cracks and Cracks up to 5mm wide - hollow when 'tapped' around the line of the crack
Use Thixotropic Epoxy Injection Resin Slow Set version. Mix up a 400cc pack of resin and place into the 400cc cartridge tube provided. Using a skeleton gun inject resin into a 50ml syringe, having first removed the plunger. Replace the plunger. Place the syringe tip firmly into the injector and gently push the plunger - you will use very little resin, so go slowly. Stop when resin appears at the surface of the crack. Move to the next injector. Thixotropic Epoxy Injection Resin is a two pack epoxy gel. It sets by chemical reaction when the two parts are fully mixed in the correct ratio - 2 Base to 1 Activator. It does not object to dampness. It does not expand or contract on setting.
Use the Slow Set version of Thixotropic Epoxy Injection Resin - allows 2 hours + before setting.
3. Cracks above 2mm wide up to 5mm wide - with voids and spaces behind the crack area
Use PU Injection Resin liquid. Pour some PU Liquid into a small pot and draw up into a 50ml syringe. Place the syringe tip firmly into the injector and gently push the plunger - you will use very little resin, so go slowly. Stop when resin appears at the surface of the crack. Move to the next injector. PU Injection Liquid is a one pack product. It cures by reacting with moisture and can expand up to 50 limes its initial volume, if there is space to do so.
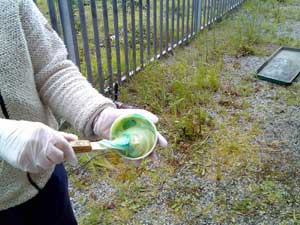
Hint - always wear disposable vinyl gloves and keep one hand on the surface whilst injecting. If you feel the surface moving you are pressurising the space beneath too much - ease off the plunger, or you may force the surface material to break away.
Injecting a piece of wood using PU Liquid.
Click to see the Injectors, check prices or buy in our Resins Order Page
General principle - where possible, for the strongest repair, rather than inject cut out the cracks with a saw, router, masonry grinder, or Allsaw, to form square edged slots, and remove all dust and debris. Avoid V shaped slots - the repair will be much weaker.
Ideal cut out through a cracks - lots of width for Epoxy Mouldable Putty
Repair Thickness - the more material that we can put in to the repair, in terms of width and depth, the better it will be able to accommodate natural movements caused by changing temperatures and therefore the better it will last.
Caution - Always consult a Structural Engineer and the Building's Insurers before proceeding. It is important to establish and eliminate the underlying cause of the cracking before Injection, otherwise further cracks are sure to appear.
Tell Tales - install our Tell Tail plastic crack movement measuring units and monitor for 3 months, if you are not sure that movement has ceased.
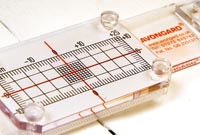
Tell Tale for measuring movement in cracks.
Click to view Tell Tales in our Surveying Equipment Order Page
OUR Order Page
- RESINS Order Page - this Site, for Epoxies and other building repair resins
- TANKING Order Page
- SURVEYING TOOLS Order Page
- MEMBRANE FOR DAMP WALLS & FLOORS Order Page
- FIRE PAINTS Order Page
- RUST CONTROL Order Page
Contact I History I Links I Privacy Policy | Returns Policy I Resins Order Page | Technical | References
Property Repair Systems
T: 01626 872886
E: Mail us help@propertyrepairsystems.co.uk
Site written by: David Moore
David Moore, B.A. (Hons.), C.T.I.S., C.R.D.S. Technical Author
Google+
Other Property Repair Systems Sites:
www.drywallandfloor.co.uk - membranes for lining damp walls, floors, basements and cellars
www.fire-door-paint.co.uk - upgrade doors to 30 minutes fire resistance
www.joist-repair.co.uk - how to quickly repair joists and beams of any size
www.propertyrepairsystems.co.uk - our Home Site
www.steel-fire-paint.co.uk - treat steel with Intumescent Paint to provide fire protection
www.timber.org.uk - systems of repair, with step by step methods
www.timber-repair.co.uk - how to repair timber beams